


Rate The App - Part One: The story of creating an Android Library.
This is the first in a series of blog posts about the process and experience of creating and publishing our “RateTheApp” widget in an Android Library.
The goal was to repackage an internal App Rating widget for reuse by other Brightec projects. This was with a view to open-sourcing it for wider reuse by the developer community.
As with any project, our first task was to map out a high level plan which followed three distinct phases:
As work got underway, it quickly became apparent that it was going to take more than one blog post and a ‘Rate The App’ series was called for.
The series will look something like this:
In this first post we'll focus on creating an Android Library.
This step-by-step guide should answer most of your questions and get your first Android Library ready to go.
It might sound obvious to decide what you're developing before you start, but I started out trying to build and include too much into the Library. A common error which can jeopardize your chances of actually delivering anything.
Tip #1 start with a modest deliverable - (you can always incrementally improve it..)
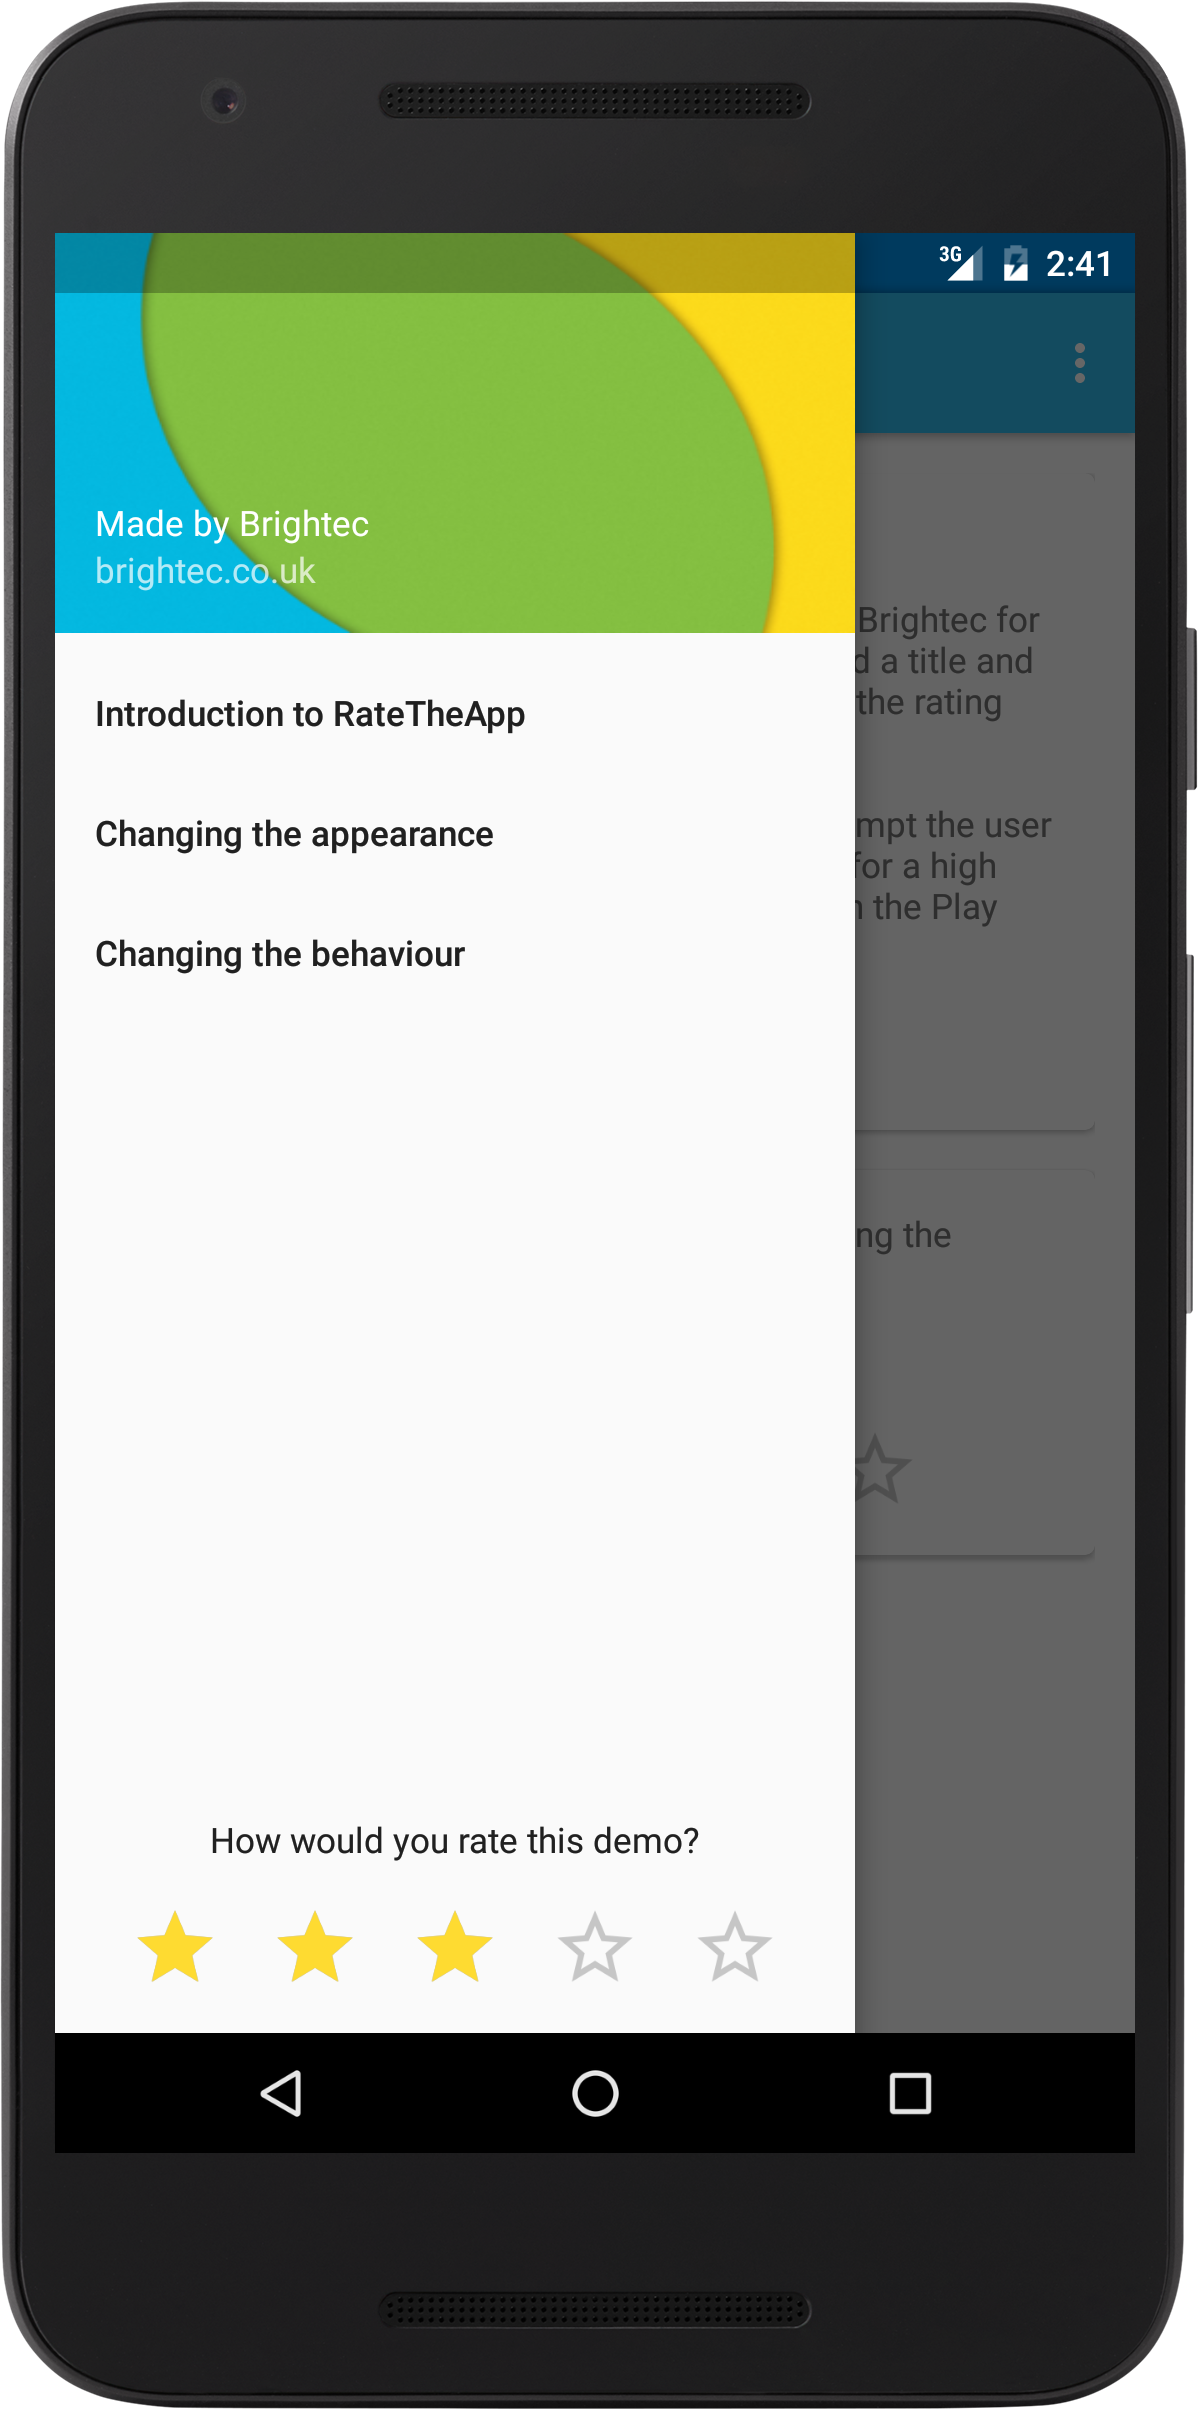
Our existing widget displayed a 5-star rating control and invited the user to rate the app - if a rating of 0, 1 or 2 stars was selected, the user was prompted whether they would like to email the app developer with any issues they might have.
If a rating of 3, 4 or 5 was selected, the user was prompted whether they would like to also leave a rating on the Play Store.
The RateTheApp Library was broadly going to have the same functionality but I also wanted to provide some flexibility in case developers had different use-cases to ours. Fairly early on in the process, I decided that I should also publish a demo app alongside the Library, to give a working example of the RateTheApp in use.
First of all, I created a new Android Studio project with a Library Module to contain the RateTheApp control and an Application Module containing the demo app.
I imported the code and assets from our internal widget into the Library Module, and did a bit of refactoring to the class and package names, removing dependencies from the old project etc. to make it ready for releasing.
I also created a private GitHub repository so that I could share the project (I planned to make it a public repo once I was ready to open-source it, probably released under an Apache license, but more on that in the next blog!).
The process of creating a demo app helped to define (or redefine) the product idea and the functionality it was providing (in the same way that Test Driven Development helps define the code being exercised).
It forced me to think through how developers might use it and want to customise it. A warning though, I did start to get carried away going down the customisation route and should have taken note of my Tip #1 from the beginning.
I had to decide what the demo and the default widget should actually look like but, fortunately for me, my desk at Brightec HQ was next to our in-house designer Jotham. He worked his magic on the demo, making it look presentable and interesting whilst also including our company branding.
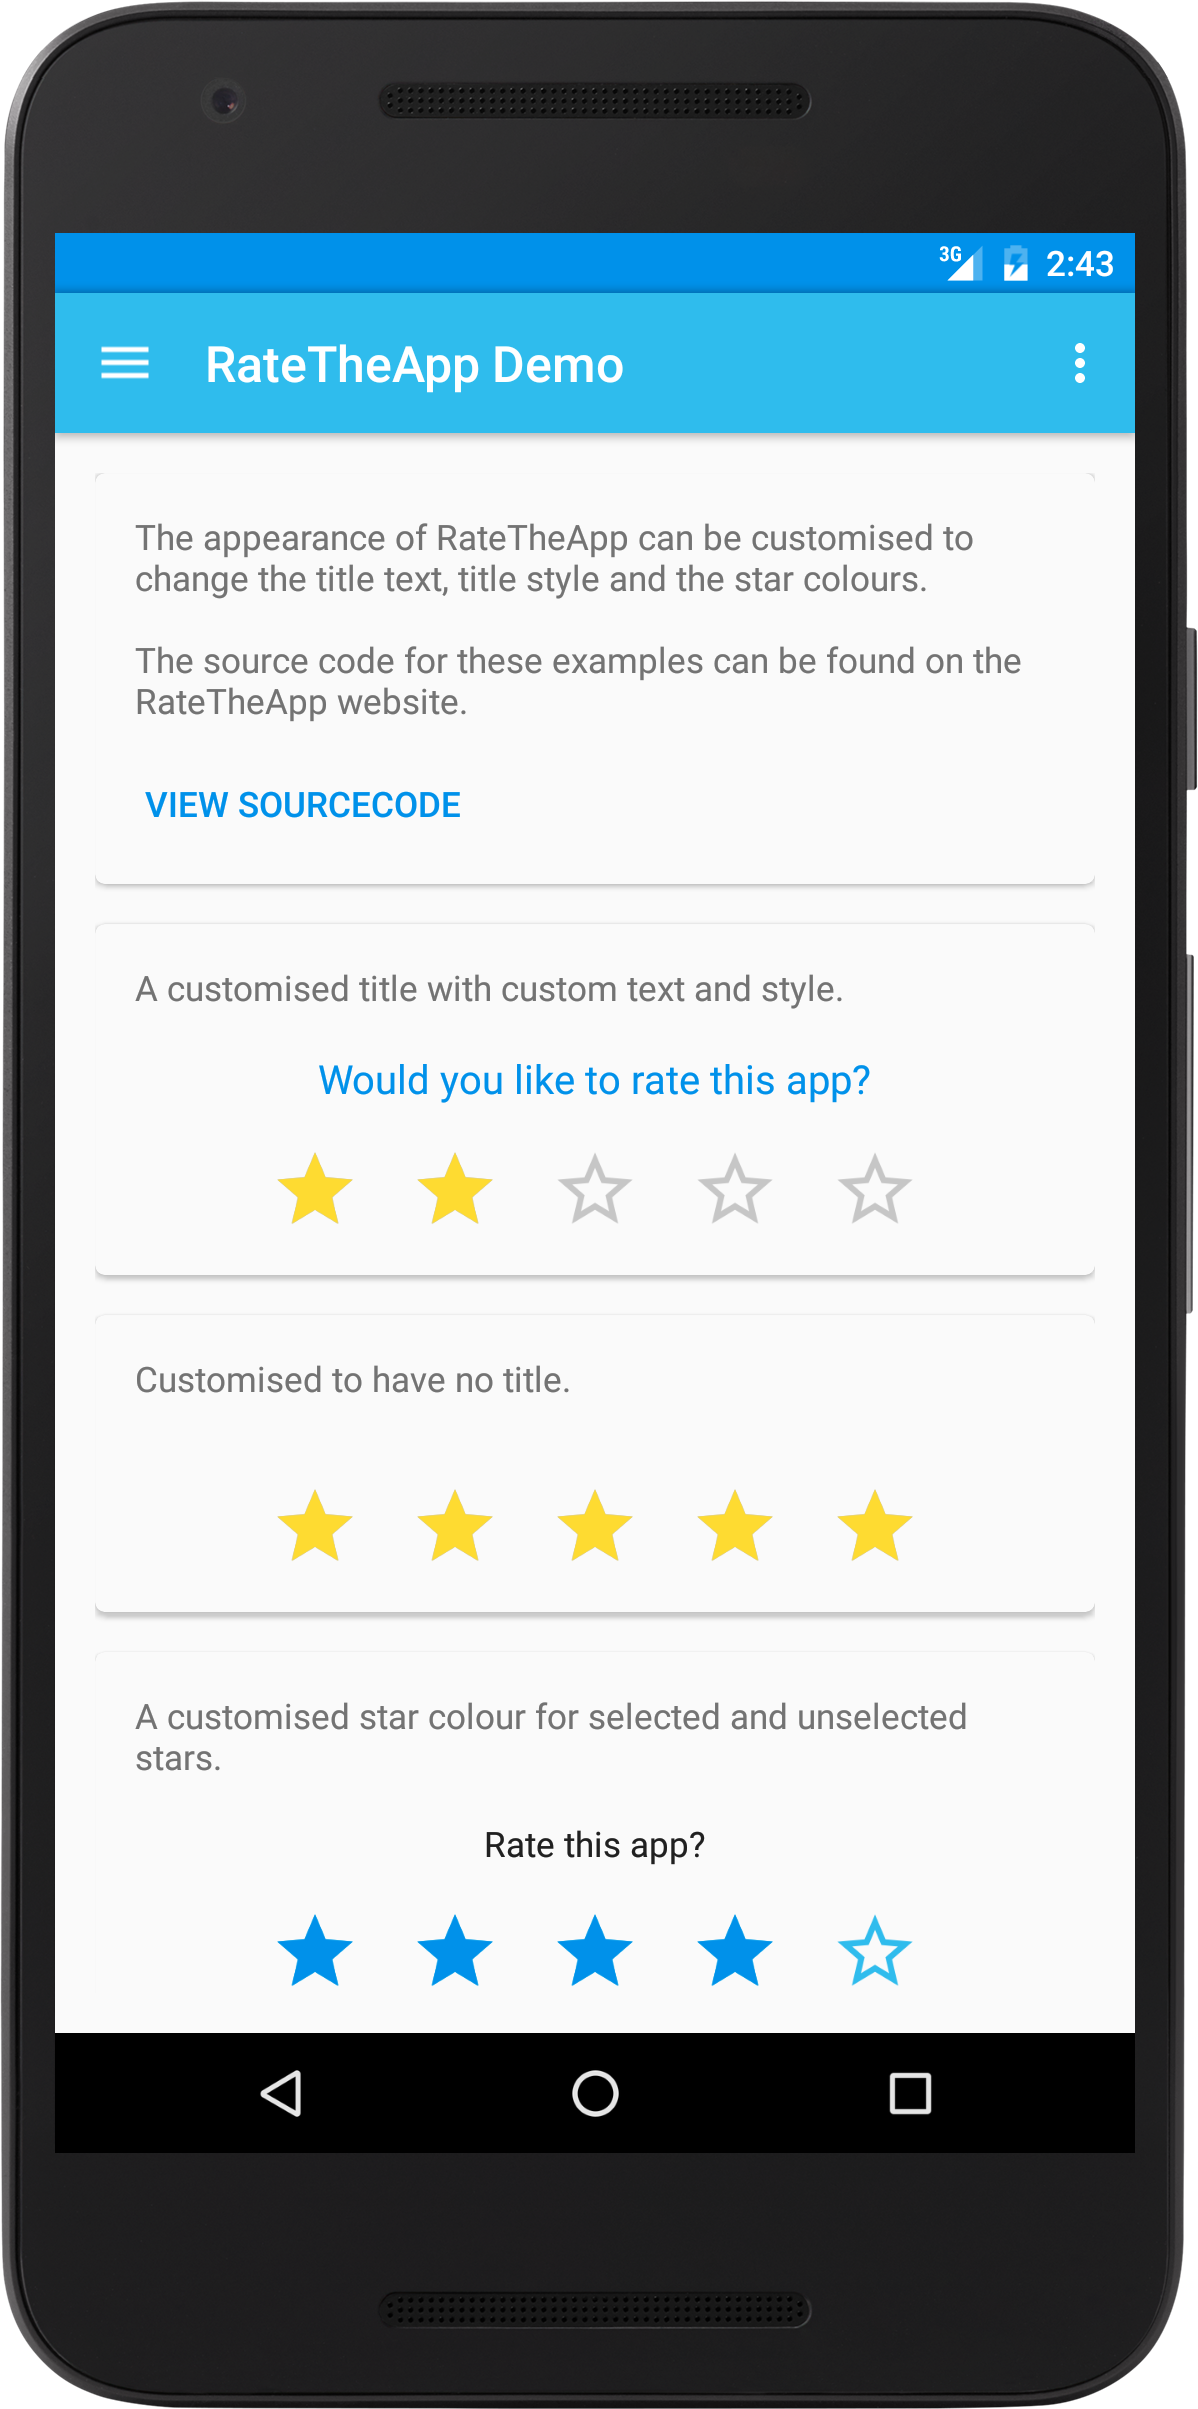
The original widget had a hard coded colour scheme matching the app it was in, however, this wasn’t going to suit everyone’s taste or requirements.
To allow some customisation and theming, I defined a RateTheApp style in an attrs.xml file (extract below) that allowed the title text and star colours to be customised.
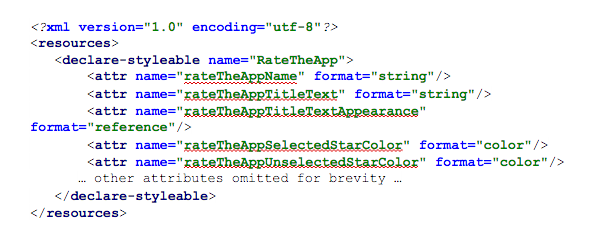
The example below, taken from a fragment layout, shows how custom text and style can be applied to the title and also defining colours for the selected and unselected stars.

I was already broadly replicating the functionality of the original widget but the ‘rating changed’ behaviour was tightly integrated with the widget code and I wanted to allow more flexibility so developers could define their own custom behaviour.
Whilst the library was still under construction, Alistair, one of our Android developers, asked if he could use it in one of his projects.
This was a perfect opportunity to de-couple the behaviour from the UI and helped us define the OnUserSelectedRatingListener interface with a default implementation providing the original behaviour.
public interface OnUserSelectedRatingListener {
 void onRatingChanged(RateTheApp rateTheApp, float rating);
}
Creating a library is one thing, but you also need to tell people how to use it!
As well as the demo app which gave a working example of how to use the new widget, I also created a GitHub project README file explaining what the library was about and simple instructions on how to use it.
Well, that's all for now - I hope that was a useful overview and has encouraged some of you to take the plunge and create libraries of your own giving something back to the wider development community.
Search over 400 blog posts from our team
Subscribe to our monthly digest of blogs to stay in the loop and come with us on our journey to make things better!
We develop intelligent mobile apps for iPhone & Android that deliver for you.
Want to connect? You can find us on Instagram, Facebook, X (formerly Twitter) and LinkedIn.
Here’s our privacy policy.
Here’s our Accessibility statement.
Copyright © 2024 Brightec Limited. All rights reserved.


