


How I used Apple’s ARKit to explore augmented reality to measure a room

Why proof of concepts matter
After moving home for the second time in a year, I looked down at my scribbled out floor plan and thought, ‘surely there’s an app for this’. About three months later, I was tasked with creating a proof of concept (POC) for a room-measuring iOS App, utilising Apple’s Augmented Reality (AR) library, ARKit.
Having never explored this API before, I stood at the foot of a learning curve, piecing together StackOverflow threads, Apple documentation and a whole bunch of trial and error, hoping to create something with a reasonable user interface that could accurately measure a room.
It came together quite nicely in the end, albeit with room for improvement (excuse the pun), so I thought I’d share some of what I’d learned during the process, which applies both to developers and those delivering a pitch.
Proving the concept
When you’re trying to win work, a proof of concept can speak volumes. It is the icing on the cake of a brilliant presentation, and assures a prospective client that the sales talk has backbone. It also comes with a set of rules and caveats that you should be aware of before handing one of your developers the mixing bowl.
1 - Your best developer is not necessarily the best person for this job
For something that may elicit no return on investment, pulling out the big guns may be like using a sledgehammer to crack a nut and could prove more expensive than necessary, especially if it takes them away from established projects. For most POCs, you may be better off picking a more junior developer who has a passion for exploration and experimentation.
2 - Focus on one aspect of the pitch
Work out the ‘killer’ feature within the app and focus on that aspect for your demo. In this case, being able to measure a room using augmented reality was something that the client was really interested in, so we focussed on building a demo around that.
3 - Set a time limit
Research and development are areas that big companies spend big money on. However, if you’re a freelance developer, or running an agency, you need to deliver your demo in record, but realistic, time. Set a sensible limit, being mindful of what the developer will need to accomplish in that time. Factor in learning curves for new technology, but don’t give them too much slack otherwise they may disappear down a rabbit hole of opportunities and new exciting options, with little to show for it.
4 - It doesn’t matter what it looks like, as long as it’s on-brand
Simply put, recognition of the client’s brand will go a long way. It shows that you’ve researched them a little and maybe even understood their mission and values. That said, you should focus on substance over style for your demo, and not get too caught up in the design of it.
5 - A video is your insurance
We’ve all been there; it’s demo time and the spotlight is upon you. You open up the app and share your screen with a waiting audience. Nothing happens, or something happens, but either way, it’s not what you hoped would happen. This is a nail biting scenario at the best of times, and if you don’t have a backup demo to hand, it could negate all of your efforts. As soon as you have a working proof of concept, be sure to make a screen recording covering everything you want to include in your pitch. Even if the demo went flawlessly, the client will have something they can take back to show their colleagues who weren’t present.
6 - Pull out all the stops
Unless the brief specifies a certain platform or operating system version, pick the most up to date OS on the platform you are most proficient with. Your proof of concept needs to deliver that all-important first impression.
7 - Mess up your code
If you’re like us, you’ve spent a lot of time honing your clean coding skills as a development team, getting as much testable code into your projects that’s DRY as a bone. Throw that all out of the window! Be experimental and push the limits. If you win the pitch, you can clean it up later, or even start over, but for now, build that killer feature in the shortest time. Treat it like a hackathon, but make sure you get some sleep.
Of course, none of this guarantees you will win the work, and unfortunately, we missed out on this occasion, but we made an impression. Not only that, we’ve expanded our knowledge and experience to encompass augmented reality, an emerging technology set to expand considerably over the coming years.
But I came here to build an app
When I first began this article, my intention was to write an AR coding tutorial, but after realising how much code had ended up in the demo, and how disastrously messy that codebase was (see above), I turned and ran in the opposite direction, opting instead to share my experiences.
However, that doesn’t mean you’ll go away empty-handed. For any iOS developers who are interested, I have made the XCode project available on GitHub. From there you can download, fork, experiment and maybe share the dimensions of your favourite rooms on social media (remembering to tag us of course).
A brief overview of the project
I chose to target iOS 14 and later. This covers a good range of devices, with a greater degree of accuracy being observed on the newer iPhones that have more specialised hardware (such as the LiDAR scanner). If you really need to delve back into Apple history, ARKit was first introduced in iOS 11, although much of what makes the technology great today wasn’t available in this version, such as scene reconstruction, depth API and improved facial recognition.
When you first open the app, you’re greeted with a simple screen containing a TAKE MEASUREMENTS button. Pressing this will present a ViewController containing an ARSCNView. Point your camera downward, and tap on a flat section of the floor in the camera view to instruct the app to lock onto the horizontal plane and move to the next stage.
Then work your way around the corners of your room, tapping on each one as you go. You will see a green dot appear where you tapped, and a red line will begin to trace the shape of your room at floor level.
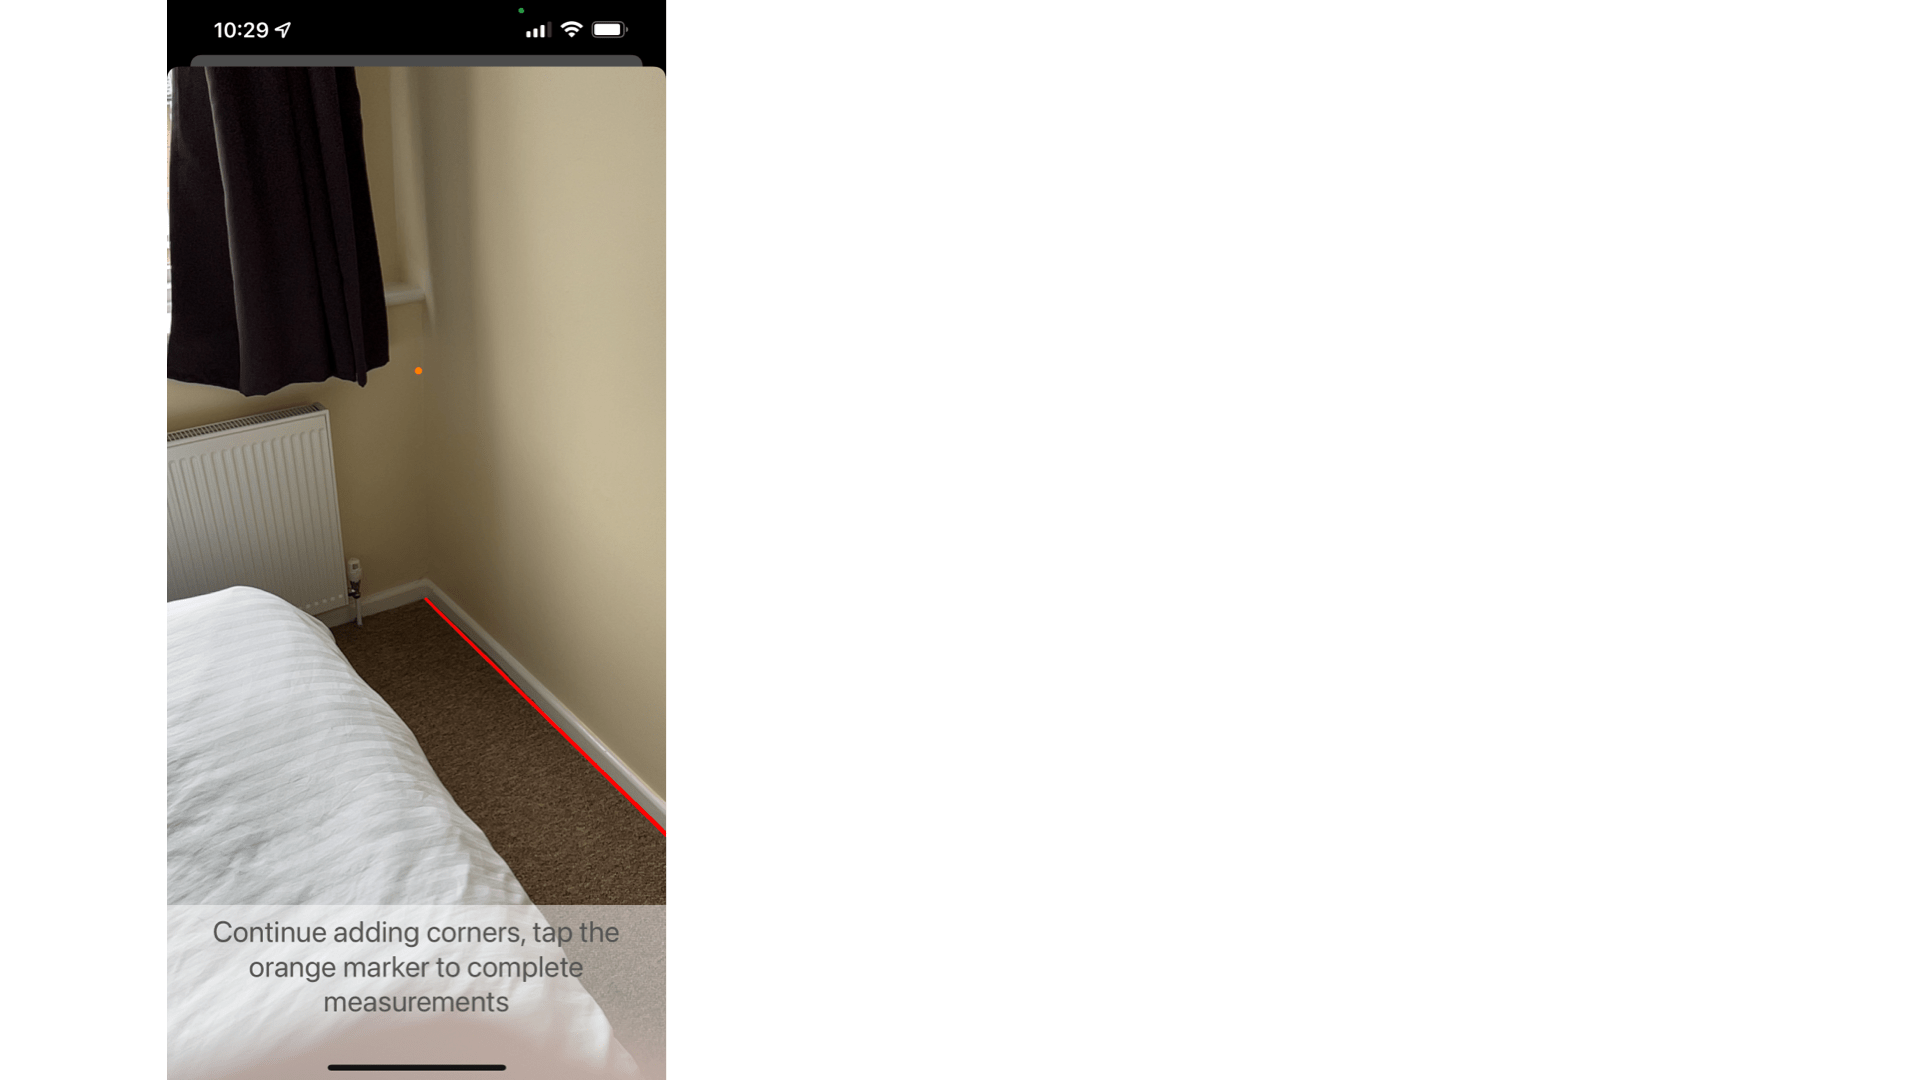
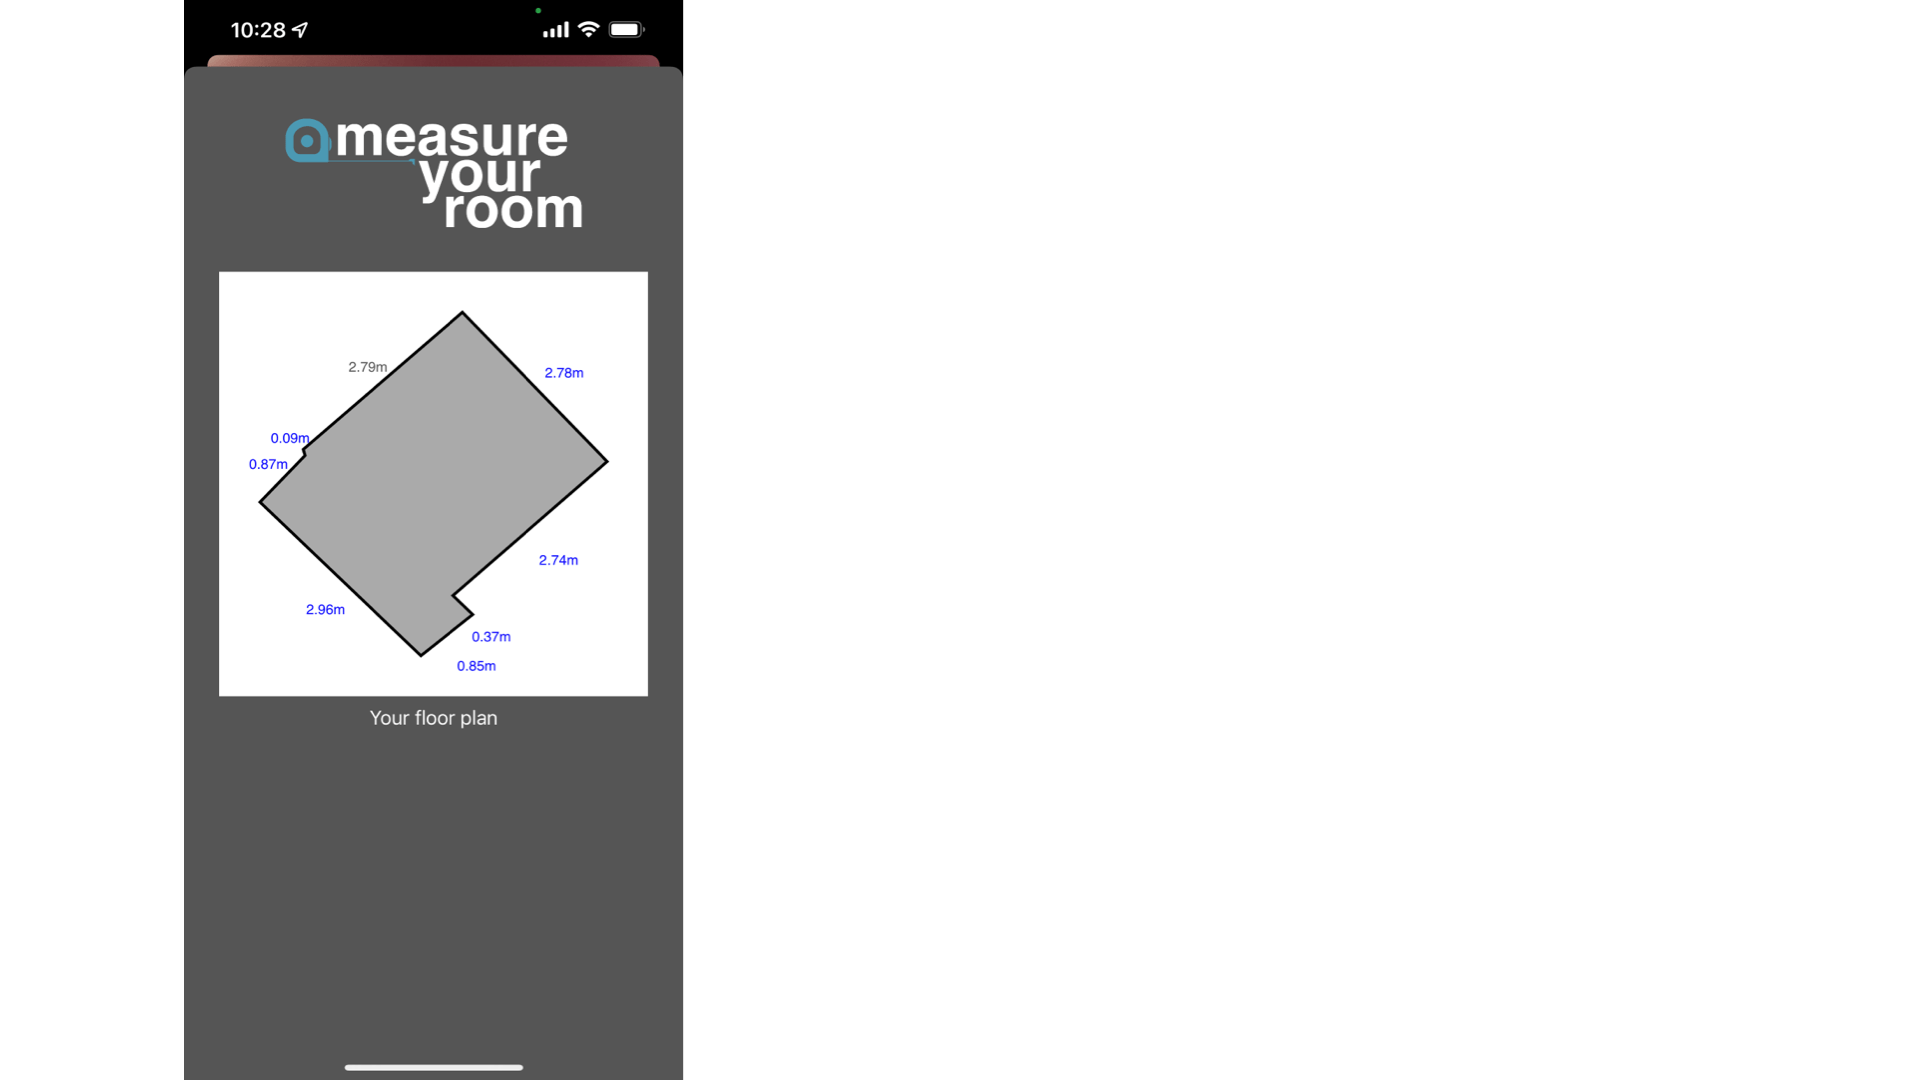
Once you have finished, tap back onto the first corner to close the path and a new screen will be presented showing the layout of your room along with the measurements of each wall.
Over to you
If you’re looking to delve into the world of augmented reality, this app should provide you with a great springboard into the technology. We’ll leave the repository on GitHub for as long as we can, though we will not be supporting it in any way. It’s purely there for your own educational and experimentational purposes.
Do let us know how you get on, and please share this article with anyone you think would benefit from it.
Looking for something else?
Search over 450 blog posts from our team
Want to hear more?
Subscribe to our monthly digest of blogs to stay in the loop and come with us on our journey to make things better!
