


How to build an RPM meter to measure the speed of your record player

Using React Native in the real world - how to build an RPM meter to measure the speed of your record player / turntable.
Vinyl is making a huge comeback, and many people, including myself, are once again enjoying this vintage hobby. Others are trying it out for the first time. Either way, the turntable manufacturers are having a field day.
But not all equipment is made equal, and not all of it needs to be bought brand new. There is a thriving second-hand market for Hi-Fi equipment, with some bargains to be found in players dating back to the last century.
But how do you know how well your gear is working. With digital audio (streaming, downloads and CDs) you know that what you are listening to is being played back at the exact speed it was recorded, but with analogue records (and tapes) you can experience differences in that playback speed, especially as belts and motors become worn with age.
Not only can turntables vary in speed, but they also suffer from what is known as wow and flutter, essentially the amount the speed varies over time, which can result in a less enjoyable listening experience as your music starts to sound warbled, or out of tune.
Where new tech meets old
Now you’ve closed that Spotify account, poured a stiff drink and dropped the needle on your favourite triple gatefold prog-rock classic, you may be wondering: “What use is my phone now?”
But before you consider parting with your old friend, remember that you’ll still need eBay to hunt down those rare collectables, Discogs to keep track of your growing collection, and the internal gyroscope to keep a check on your audio equipment.
With the help of React Native, we’re going to build an RPM (revolutions per minute) meter so you can make sure your records are playing back at the right speed.
Getting started
We’ll be using React Native, and I will make the assumption that you are familiar enough with the framework to create a new application to begin working on. If you’re not at that stage yet, there are plenty of online blogs, courses and videos to teach you React Native from the ground up, such as this short course on YouTube. Be sure to come back once you’re up and running, though.
We will build our RPM meter as a component that can be dropped into any React Native project, mainly so we do not become bogged down with the minutiae of project setup, and can focus purely on the task at hand.
You will need
Firstly you will need a mobile device which contains an internal gyroscope. I would recommend a phone over a tablet, as you will be placing this on your turntable, and a tablet may be just a tad too bulky.
Secondly, you will need to install the react-native-sensors library. Open a terminal window in your project and if you use npm, enter:
npm install react-native-sensors --save
or if you are using yarn, enter:
yarn add react-native-sensors
Once the library is installed, if you plan on building to an iOS device, you will also need to update the cocoapods by entering:
cd ios
pod install
At this stage, it is worth running the project on your device to ensure everything is working as expected (remember to navigate back up to the root of the project before doing so).
Setting up the component
These days, when building React components that contain a reasonable amount of business logic, I tend to create a View component and an accompanying Custom Hook in order to separate out the concerns. For more details on this, see my previous blog (How to write more structured and testable React code using Custom Hooks).
To start work on the component, let’s create a components folder within the project’s src folder, and within that another folder called “RpmMeter”.
Within that folder, we will create three files, index.js, RpmMeter.view.js and RpmMeter.hook.js. We will populate them as follows in order to create a basic component and hook:
RpmMeter.hook.js
import { useState } from 'react'

export const useRpmHook = () => {
 const [rpm, setRpm] = useState(0)
 return {
 rpm,
 }
RpmMeter.view.js
import React from 'react'
import { StyleSheet, View, Text } from 'react-native'
import { useRpmHook } from './RpmMeter.hook'
export const RpmMeterView = () => {
 const { rpm } = useRpmHook()
 return (
 <View style={styles.container}>
 <Text>{rpm}rpm</Text>
 </View>
 )
}

const styles = StyleSheet.create({
 container: {
 backgroundColor: 'orange',
 }
})
Next, we have index.js which I tend to add in order to make imports cleaner throughout a project’s codebase. You could skip this and just import straight from RpmMeter.view.js, it’s entirely up to you. I intend to write more about this (and the abstract binding of Views and Hooks) in a future blog post.
export { RpmMeterView as RpmMeter } from './RpmMeter.view'
And finally, we can add the component to our App.js file by importing our component,
import { RpmMeter } from './src/components/RpmMeter';
and then inserting it into the main screen layout.
 <SafeAreaView style={defaultStyles.fullScreen}>
 <StatusBar/>
 <RpmMeter/>
 </SafeAreaView>
In what direction are we headed?
Now it’s time to dive into our sensor library and find out what our gyroscope is telling us.
Firstly, in RpmMeter.hook.js we will need to amend our imports:
Now it’s time to dive into our sensor library and find out what our gyroscope is telling us. Firstly, in RpmMeter.hook.js we will need to amend our imports:
import { useState, useEffect } from 'react'
import { gyroscope, setUpdateIntervalForType, SensorTypes } from "react-native-sensors";
Firstly, we have added the useEffect hook from React. This will allow us to run a piece of code once, when the component is first mounted, and then some cleanup code when it has been unmounted.
Secondly, we have imported gyroscope, setUpdateIntervalForType and SensorTypes from our sensors library. The gyroscope object will give us access to the internal gyroscope of your device, setUpdateIntervalForType will allow us to set the speed at which we sample the gyroscope data, and SensorTypes is an enum which we will need to pass into the update interval function, so that is knows which sensor we wish to configure.
All that remains is for us to add a call to useEffect inside our Hook, that will set the interval, subscribe to the stream of gyroscope data, and then update our rpm value with a meaningful value (that will be displayed on our component view).
With this code added, our RpmMeter.hook.js should look like this:
import { useState, useEffect } from 'react'
import { gyroscope, setUpdateIntervalForType, SensorTypes } from "react-native-sensors";
const getRpm = (rotation) => Math.abs(rotation * 180 / Math.PI) / 6

export const useRpmHook = () => {
 const [rpm, setRpm] = useState(0)

 useEffect(() => {
 setUpdateIntervalForType(SensorTypes.gyroscope, 10)
 const subscription = gyroscope.subscribe(
 (values) => setRpm(
 getRpm(values.z).toFixed(1)
 )
 )
 return () => subscription.unsubscribe()
 }, [])

 return {
 rpm,
 }
}
Let’s go through what we’ve added.
Firstly, you will see the getRpm function we have added. It’s a simple mathematical function to convert the reading from the gyroscope, which is in radians travelled per second since the last reading, to revolutions per minute.
We start by converting the radian value to degrees by multiplying it by 180 and dividing by PI. We grab the absolute value of this, because regardless of the direction of travel the RPM needs to be a positive value. We then need to multiply the degrees per second by 60 (to get degrees travelled per minute) and then divide that by 360 to get the revolutions per minute. We can simplify multiplying by six and dividing by 360 by simply dividing by 6.
Now the maths is out of the way, all that remains is to pass the calculated RPM value onto the view so the user can read it.
Inside the useEffect hook, we set the update interval to 10 milliseconds. This runs fine on my device, but if you find yours is struggling, try setting a higher value. This will reduce the sample time, and put less strain on your phone (and maybe its battery).
Finally, we add a subscription to the gyroscope sensor. This function takes a callback, passing a set of values for x, y and z rotation, and a timestamp. For this project, we’re only concerned with the z value (the amount our device rotated on the z axis per second in radians), and you’ve guessed it, we pass that value into our getRpm function, and set the rpm state value to the result, which gets passed out of the hook and picked up in our view.
If you run this now, and rotate your phone, you should notice the value increases the more you move, settling back to zero if you set your phone down on a surface. If you’re not seeing these results, double check the code. If you’re seeing errors in the Metro logs saying the gyroscope is not available, you may need to dig into your device’s config to enable it or give the app permissions to use it (it may show up as location services). If it’s still not available, check the library documentation.
Hopefully, you didn’t run into any issues and we can now get to the fun part.
Finishing touches
Let’s make some modifications to the View, and add a little artwork to make the readings stand out more:
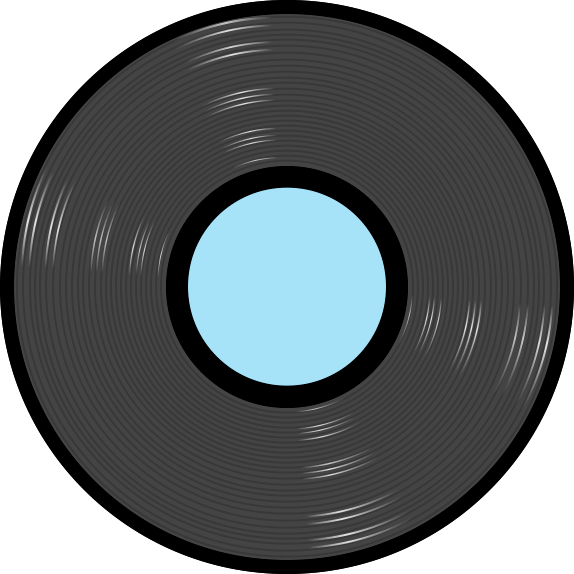
Create an images folder inside the RpmMeter folder, right click on the record image below and store it in the new images folder as record.png.
import React from 'react'
import { StyleSheet, View, Image, Text } from 'react-native'
import { useRpmHook } from './RpmMeter.hook'
export const RpmMeterView = () => {
 const { rpm } = useRpmHook()
 return (
 <View style={styles.container}>
 <View style={styles.meter}>
 <View style={styles.center}>
 <Image
 style={styles.record}
 source={require('./images/record.png')}
 />
 <Text style={styles.rpm}>{rpm}</Text>
 </View>
 </View>
 </View>
 )
}

const styles = StyleSheet.create({
 container: {
 flex: 1,
 alignItems: 'center',
 justifyContent: 'center',
 },
 meter: {
 width: 400,
 height: 400,
 },
 center: {
 position: 'absolute',
 left: 0,
 right: 0,
 top: 0,
 bottom: 0,
 alignItems: 'center',
 justifyContent: 'center',
 },
 record: {
 position: 'absolute',
 left: 0,
 right: 0,
 top: 0,
 bottom: 0,
 width: 400,
 height: 400,
 },
 rpm: {
 fontSize: 64,
 fontWeight: 'bold',
 }
})
I won’t delve into the details here, as they are mainly style changes and I’ll leave you to tweak them to suit your display or colour preferences.
Putting it to the test
Now head over to your turntable, make sure the tonearm is safely out of the way and you haven’t left any priceless vinyl on the platter.
Place your phone on the platter, face up, as central as possible. If you can raise it above the spindle, all the better, although a slight tilt probably won’t affect the accuracy too much.
Set the speed of your turntable to 33.3rpm and turn it on. If you have an automatic turntable, there should still be an override that allows you to start the platter turning without moving the tonearm across.
Keep an eye on the phone screen; all being well, you should see the value increase to around 33.3 (my vintage Rega Planar comes in a little fast at around 33.5). After you’ve got your reading, switch to 45 rpm and try again.
Hopefully, your equipment isn’t too far off the ideal values.
Next steps
To briefly summarise, we have just built a React Native component which uses your phone’s gyroscope to calculate the rotation of a Hi-Fi turntable, and see how close to 33.3 or 45 rpm the platter is turning and therefore how close to the industry standard speed your records are playing.
At this stage, the component does not tell us how much the speed varies over time, giving us that all important wow and flutter reading. That will be the subject of a future post, so please keep an eye on our website, or sign up to our newsletter to find out when the next instalment is ready.
Looking for something else?
Search over 450 blog posts from our team
Want to hear more?
Subscribe to our monthly digest of blogs to stay in the loop and come with us on our journey to make things better!
